

Bathroom details often decide whether a renovation feels refined or merely finished. A Drain Trim Set covers the visible interface between water, tile, and hardware. It must resist corrosion, align cleanly, and remain serviceable after installation. Small errors become obvious under bright vanity lighting.
The U.S. Environmental Protection Agency estimates household leaks waste nearly 1 trillion gallons of water annually. A poorly fitted drain may not create an immediate puddle, but damaged seals can encourage moisture behind the finished surface. Richard Trethewey, master plumber and This Old House plumbing expert, often reminds homeowners, “Water always wins.” That warning remains practical, even when the fixture looks flawless.
This guide evaluates seven Drain Trim Set options for bathroom projects, considering material quality, finish durability, compatibility, installation difficulty, and long-term maintenance. The selection reflects real renovation concerns, including tight cabinet spaces, uneven tile cuts, and hard-water buildup around the flange. The review also considers EPA WaterSense guidance and current bathroom design priorities reported by the National Kitchen & Bath Association. Not every attractive set is a sensible purchase. Some polished finishes show fingerprints quickly. Others hide a weak gasket behind impressive packaging. That distinction deserves more attention.
A dependable choice should fit the existing drain body, match the bathroom’s visual language, and survive repeated cleaning. Chrome remains practical. Matte black looks dramatic. Brushed brass can soften a stark room. Yet finish alone proves little. The following seven options balance appearance with evidence, usability, and repair-minded judgment.
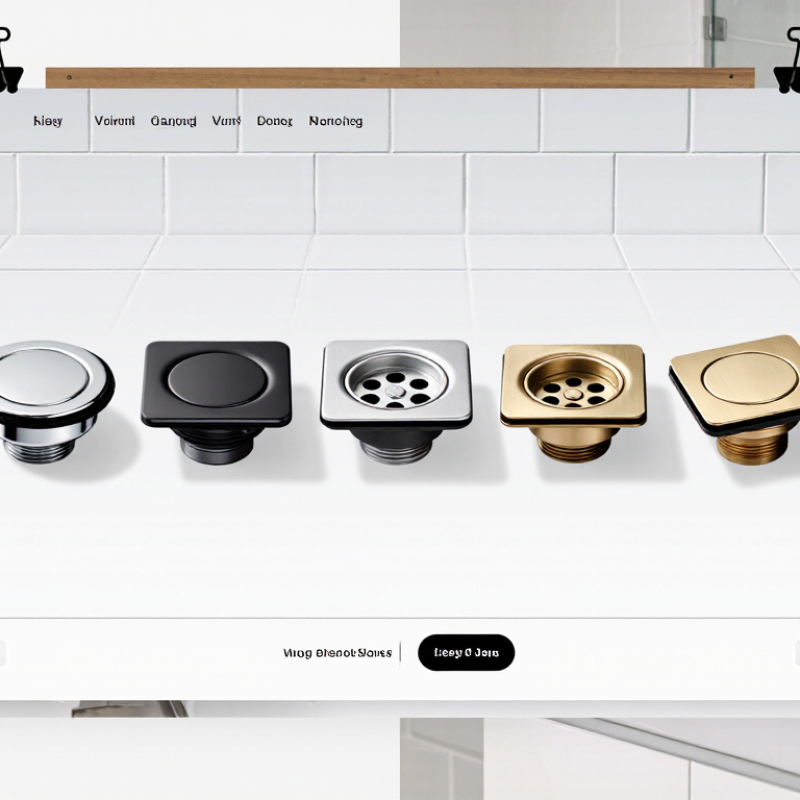
A bathroom drain trim set usually includes a visible drain flange, stopper, overflow cover, gasket, linkage, and mounting screws. Some sets also include a matching overflow gasket or a lift-and-turn mechanism. These parts control water flow and protect the opening around the bathtub or basin.
Small parts matter.
In renovation work, I check the drain opening, pipe size, stopper style, and available clearance before choosing a set. A polished finish looks attractive, but the internal material matters more. Corrosion-resistant metal, firm threads, and a flexible gasket can reduce leaks under regular use.
Measure twice.
A trim set with the wrong thread pattern may appear suitable, then fail during installation.
The best choice also fits the bathroom’s cleaning habits. A removable stopper helps clear hair and soap buildup, while a smooth flange is easier to wipe. I once focused too much on appearance and overlooked the overflow cover’s screw spacing. The installation became unnecessarily difficult.
That mistake still influences my recommendations. Check the dimensions, gasket thickness, finish quality, and replacement-part availability. A reliable drain trim set should install cleanly, seal evenly, and remain practical after months of daily use.
7 Best Drain Trim Sets for Bathroom Projects?
Choosing the right drain trim set starts with compatibility, not appearance. Confirm the drain size, pipe connection, stopper style, and overflow design. Sink, tub, and shower drains usually require different components. Measure twice.
Material affects service life. Stainless steel and solid brass generally resist daily moisture better than thin plated metal. However, material labels can be unclear. Check the product specifications, finish thickness, and cleaning instructions before buying. A polished surface may show water spots, while a brushed finish can hide minor marks.
Fit matters. Compare the trim set with your existing drain body, gasket, and overflow opening. Some replacement parts look universal but use different threads or stopper mechanisms. Dry-fit the components before applying sealant. The flange should sit evenly, with no rocking or visible gaps. Keep the sealant suitable for bathroom plumbing and follow its curing time carefully.
I once overlooked the overflow cover shape and had to reorder a compatible part. That mistake was avoidable. Check whether the set includes the flange, stopper, strainer, overflow plate, screws, and seals. Clear installation instructions are also valuable, especially when the old drain is corroded. If measurements remain uncertain, ask a qualified plumbing professional to verify the connection before purchase. Local plumbing requirements may also influence the acceptable drain configuration.
Choosing drain trim is not only a style decision. It affects water flow, cleaning, and long-term maintenance. In my bathroom installations, I check the drain opening, pipe size, and floor slope before comparing finishes. A polished surface looks sharp, but it often shows water spots quickly. Brushed or textured finishes hide minor marks better. Measurements matter more than appearance.
For a compact shower, a standard round trim set usually offers simple fitting and easy replacement. Linear drain trim suits larger tiled floors and creates a cleaner visual line. A square set may match geometric tile layouts, though small alignment errors become obvious. For bathtub projects, select the overflow and drain trim together. Some sets include matching covers, while others require separate parts. Always confirm compatibility with the existing waste assembly. I once underestimated tile thickness, and the finished cover sat too low. It worked, but it was not ideal.
Tips: Remove the old cover and measure its diameter before ordering. Test the drain with a small bucket of water. Watch for slow flow, movement, or standing water. Use a removable hair catcher where practical. Check the finish under bathroom lighting, not only in a showroom. If the seal or threads look damaged, ask a qualified plumber for an inspection.
A drain trim set looks simple, but small measurement errors create expensive leaks. Measure the existing drain opening, not the old decorative cover. Record the opening diameter, drain body depth, thread pattern, and pipe material. A flashlight helps. So does a ruler.
For most bathroom replacements, remove the old trim carefully and clean every sealing surface. Confirm the new flange matches the drain body and local plumbing requirements, including applicable ASME A112.18.2 or CSA B125.2 standards. Apply the sealant specified for that assembly. Plumber’s putty may suit some metal flanges, while silicone is often required for particular surfaces. Do not guess here. Guessing is where trouble starts.
Seat the flange evenly, then tighten it by hand before using a wrench for a small final turn. Excess force can distort the gasket or crack surrounding material. Wipe away squeeze-out immediately. After installation, run water for several minutes and place a dry paper towel beneath the joint. Even a tiny wet mark matters. The U.S. Environmental Protection Agency reports that household leaks can waste nearly 10,000 gallons of water annually, while nationwide leaks may waste almost 1 trillion gallons. That makes sealing a practical water-saving step, not merely a cosmetic detail. EPA WaterSense, “Leaks Can Run, But They Can’t Hide,” 2024. Recheck the connection after 24 hours. I sometimes skip that final inspection, and it is a mistake.
Choosing among seven drain trim sets requires more than matching a finish. Check the drain diameter, overflow opening, stopper mechanism, and access space first. Stainless steel, brass, and corrosion-resistant alloys usually tolerate bathroom moisture better than thin plated materials.
Clean the trim weekly with mild soap and a soft cloth. Avoid abrasive powders, stiff brushes, and chlorine-heavy cleaners. They can dull finishes and weaken nearby seals. Remove hair from the stopper and strainer before it forms a dark, compact plug. A plastic removal tool works better than forcing a screwdriver against the drain surface.
Check the flange, gasket, and overflow plate every three months. Look underneath with a flashlight. Moisture, green residue, or swollen cabinet wood deserves attention.
Replacement becomes sensible when threads strip, plating flakes, or the stopper no longer holds water. Measure twice. I would not assume a “universal” drain fits every bathroom basin. It often does not.
Still, even careful selection can fail when the old basin has uneven surfaces. Apply sealant sparingly, hand-tighten first, and test with a full basin. Wait, then inspect below for drops.
How can we help you?
Call to 0034 943884600 Contact usWe use cookies to ensure that we give you the best experience on our website. If you continue without changing your settings, we'll assume that you agree to receive cookies on the HINE website. For more information read our cookie policy page, click the link for more information.plugin cookies
ACEPTAR